Git & GitHub
In this section, I will explain how to integrate Git and GitHub into R Studio. While R Studio is already an excellent tool, it becomes even more powerful when combined with Git and GitHub. Git is a free and open-source distributed version control system that tracks changes in your code as you work on your project, ensuring you are aware of any modifications made to your script (and other) files. Tracking changes is crucial to avoid unintended errors in your code and helps prevent the creation of redundant files. Although Git is primarily a local system, it has an online counterpart called GitHub.
To set up this system, you’ll need to follow a few steps. The first step is to install Git on your computer:
For Windows: Install Git from here. During the installation process, you’ll be prompted about “Adjusting your PATH environment.” Choose “Git from the command line and also from 3rd-party software” if it’s not already selected.
For Mac: Follow the instructions provided here.
Once Git is installed, open R Studio and navigate to Create Project > New Directory > New Project. If you see the checkbox labeled “Create a git repository,” make sure to select it before creating your new project (refer to Figure 23.13). This action will display the Git pane on the upper right panel of R Studio, indicating that Git integration is enabled.
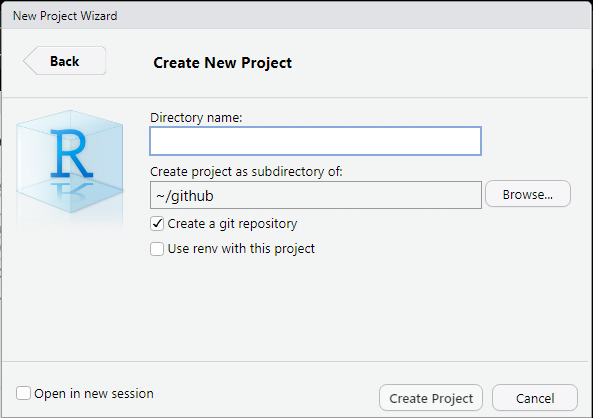
Figure 23.13: After installing Git, you should see Create a git repository.
If you are unable to find the options mentioned above, follow these steps:
- Click on
Toolsin the menu bar of R Studio. - Select
Terminaland then chooseNew Terminal. - In the terminal window, type
where gitand press Enter. This command will display the location of the Git executable on your computer. - Next, go back to
Toolsin the menu bar and selectGlobal Options. - In the options window, navigate to
Git/SVN. - Look for the field labeled Git executable and specify the location of the Git executable that you obtained from the terminal.
After setting up Git, you can proceed to create an account on GitHub. It’s a free platform, and when choosing a username, consider using lowercase letters and including your name to make it easier for others to find you.
While R Studio seamlessly integrates with Git and GitHub, using a Git client can provide additional visual aids. There are various options for Git clients (see choices here), but for this exercise, we will use GitHub Desktop. Install GitHub Desktop on your computer from here.
Commit & Push
Register Your Git repo
To open the R Project you’ve just created as a git repository, follow these steps:
- Open R Studio.
- Click on
Filein the menu bar. - Select
Open Project. - Browse to the directory where you created the
R Projectand select the corresponding.Rprojfile. - R Studio will open the project, and you will see the project name in the top-right corner of the window.
To create a sample .R file named sample.R within the project, you can use the shortcut Ctrl + Shift + N or follow these steps:
- Click on
Filein the menu bar. - Select
New File. - Choose
R Script. - A new script editor will open, where you can write your R code.
- Write your code in the editor and save it as
sample.Rby clicking onFileand selectingSaveor using the shortcutCtrl + S.
Remember to save the file after writing your code.
## produce 100 random numbers that follows a normal distribution
x <- rnorm(100, mean = 0, sd = 1)

## estimate mean
mean(x)

## estimate SD
sd(x)
To open the GitHub Desktop app, locate the application on your computer and launch it. Once opened, you will see a GUI similar to the one depicted in Figure 23.14.
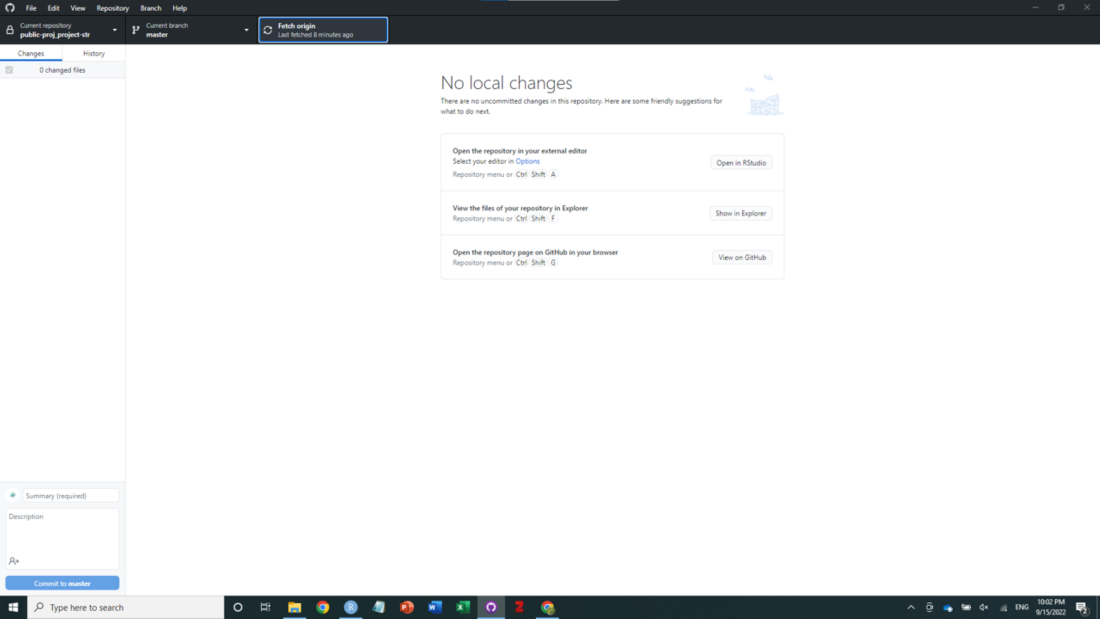
Figure 23.14: GUI for GitHub Desktop
Click on the “Current Repository” button located at the top left corner of the GitHub Desktop app interface. Then, select “Add” followed by “Add existing repository” from the drop down menu, as shown in Figure 23.15.
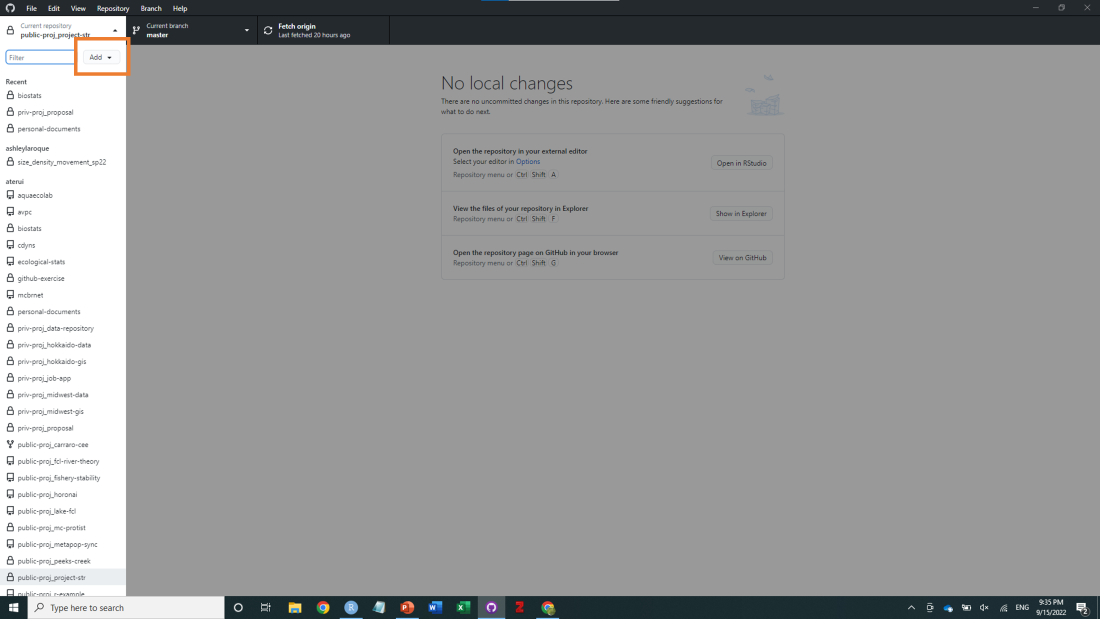
Figure 23.15: Add dropdown on the top left
Commit
GitHub Desktop will prompt you to enter a local path to your Git repository. Browse and select the directory where your R Project is located. Once you have selected the directory, the local Git repository will appear in the list of repositories on the left side bar of GitHub Desktop, as shown in Figure 23.15.
Now that your repository is added to GitHub Desktop, you are ready to start committing your files to Git. Committing is the process of recording the changes made to your files in Git. To proceed with committing, click on your Git repository in GitHub Desktop. You will see the following options and information displayed:
- The list of changed files: This section shows the files that have been modified since the last commit.
- A summary of the changes: This section provides an overview of the changes made to the selected files.
- Commit message: This is where you can enter a descriptive message explaining the changes made in the commit.
By providing a meaningful commit message, you can keep track of the changes made to your files and easily understand the purpose of each commit.
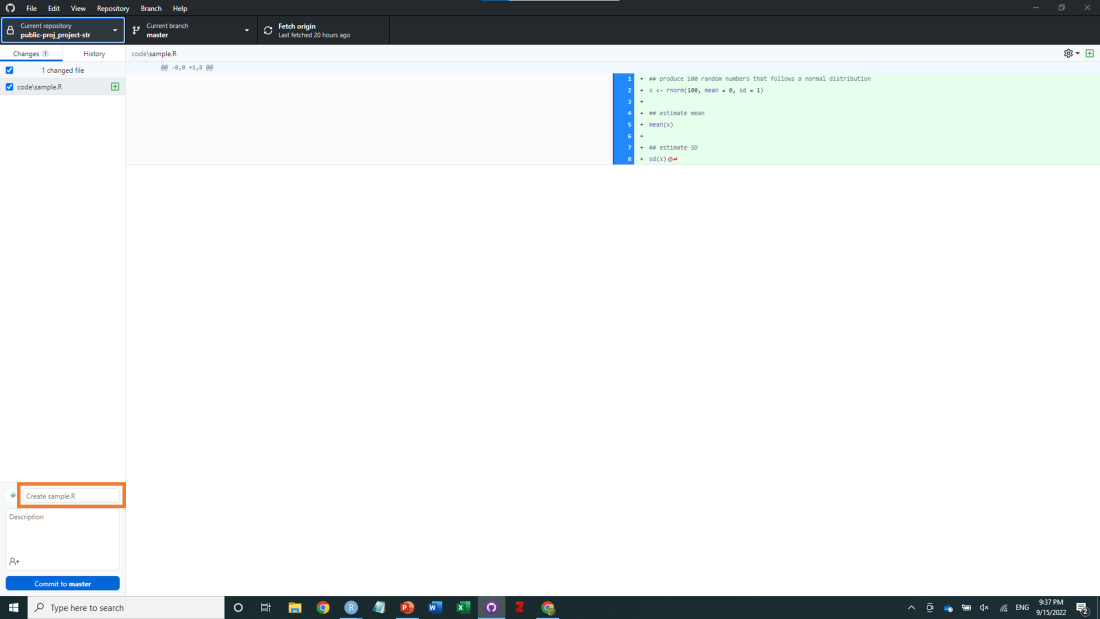
Figure 23.16: You will see Create sample.R or summary (required) on the bottom left
At this stage, your file (.R or any other file) is saved in your local directory but has not been recorded in Git as a change history. To commit the changes, follow these steps:
First, select the file(s) you want to commit. You can do this by checking the checkboxes next to the files listed in the “Changes” section of the GitHub Desktop app.
Once you have selected the files, go to the bottom left of the GitHub Desktop app window. You will see a small box that says
summary (required)orCreate sample.R.In this box, enter a descriptive title that explains what you did in this commit. It is important to provide a meaningful summary, as you cannot proceed with the commit unless you enter this information. For example, for this exercise, you can enter
Initial commitas the commit title. For subsequent commits, it is recommended to provide more informative commit messages that accurately describe the changes made. You can refer to online resources for recommendations on how to write effective commit titles and descriptions.After entering the commit title, click on the button that says
Commit to master. This action will record the changes made to the selected files in Git.
Now, the changes to the selected files have been successfully recorded in Git as a commit. It’s important to commit regularly and provide meaningful commit messages so that you can track changes and understand the evolution of your project when needed.
Push
It’s important to note that your changes are currently recorded in your local computer’s Git repository but have not been published to your online GitHub repository. To send the local changes to the online GitHub repository, you need to use the “Push” operation through GitHub Desktop.
After you make a commit in GitHub Desktop, you will be prompted with a dialog box asking if you want to push the commit to an online repository, as shown in Figure 23.17. If this is your first push, there won’t be a corresponding repository on GitHub linked to your local repository. In this case, GitHub Desktop will ask if you want to publish it on GitHub. Please note that “publishing” here means making the repository available on GitHub, but it will remain private unless you explicitly choose to make it public.
If you are comfortable with the changes you made and want to send them to the online repository, click the “Push” button in GitHub Desktop. This action will push your commits to the remote repository on GitHub, effectively synchronizing your local repository with the online repository.
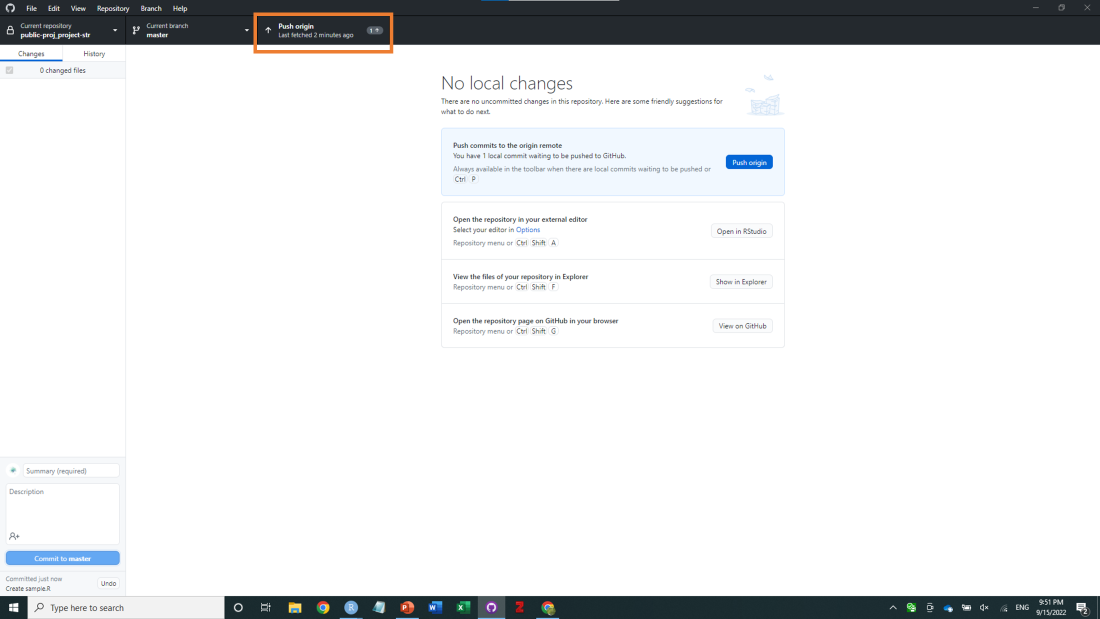
Figure 23.17: To Push your code, hit the highlighted menu button
Edit
We have created a file named sample.R as per the previous instructions. Now, let’s make a minor change to the content of the sample.R file. Open the sample.R file in your preferred text editor or in R Studio, and make a modification to the code. For example, you can update the code from:
## produce 100 random numbers that follows a normal distribution
x <- rnorm(100, mean = 0, sd = 1)

## estimate mean
mean(x)

## estimate SD
sd(x)
to:
## produce 100 random numbers that follows a normal distribution
x <- rnorm(100, mean = 0, sd = 1)

## estimate mean
median(x)

## estimate SD
var(x)
Save the changes to the sample.R file. Now, let’s go back to GitHub Desktop and see how we can handle this change.
After making the change to the sample.R file, open GitHub Desktop again. You will notice that GitHub Desktop automatically detects the difference between the new and old versions of the file. It highlights the specific parts of the script that have been edited, which can be extremely helpful when reviewing and comparing changes in your code.
This feature provided by GitHub Desktop makes it easier to track modifications and understand the specific updates made to your files. It helps streamline the coding process by providing a clear visual representation of the differences between different versions of your code.
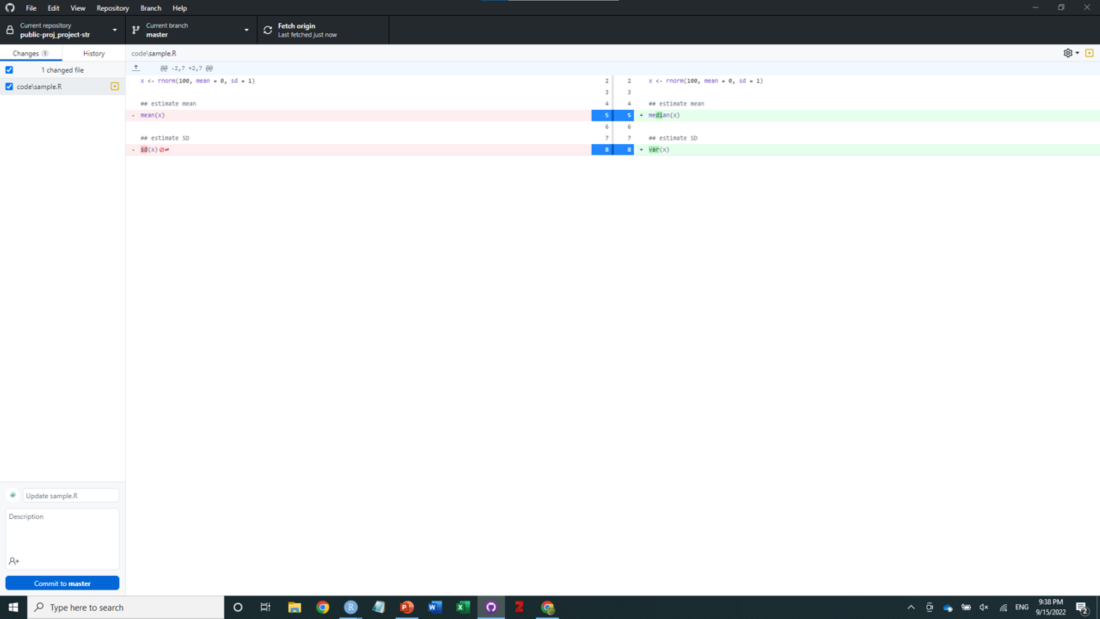
Figure 23.18: Git detects edits to your codes
A sample repository can be found here.